MK1 VW Restoration – At it again.

20130210-184216.jpg

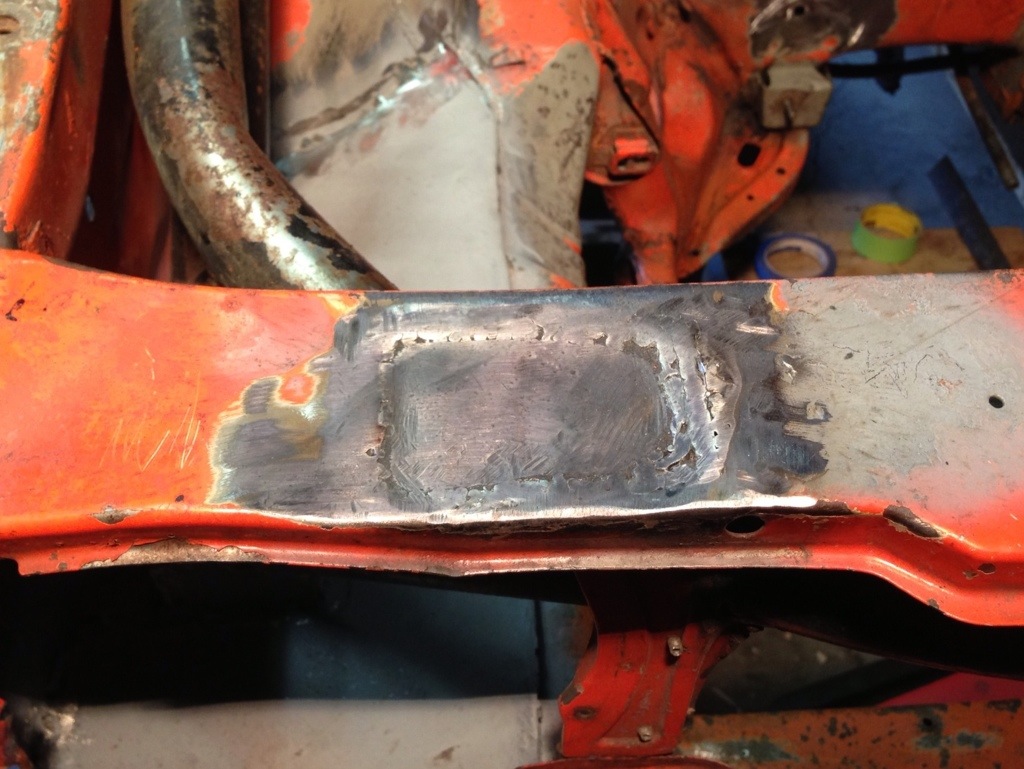
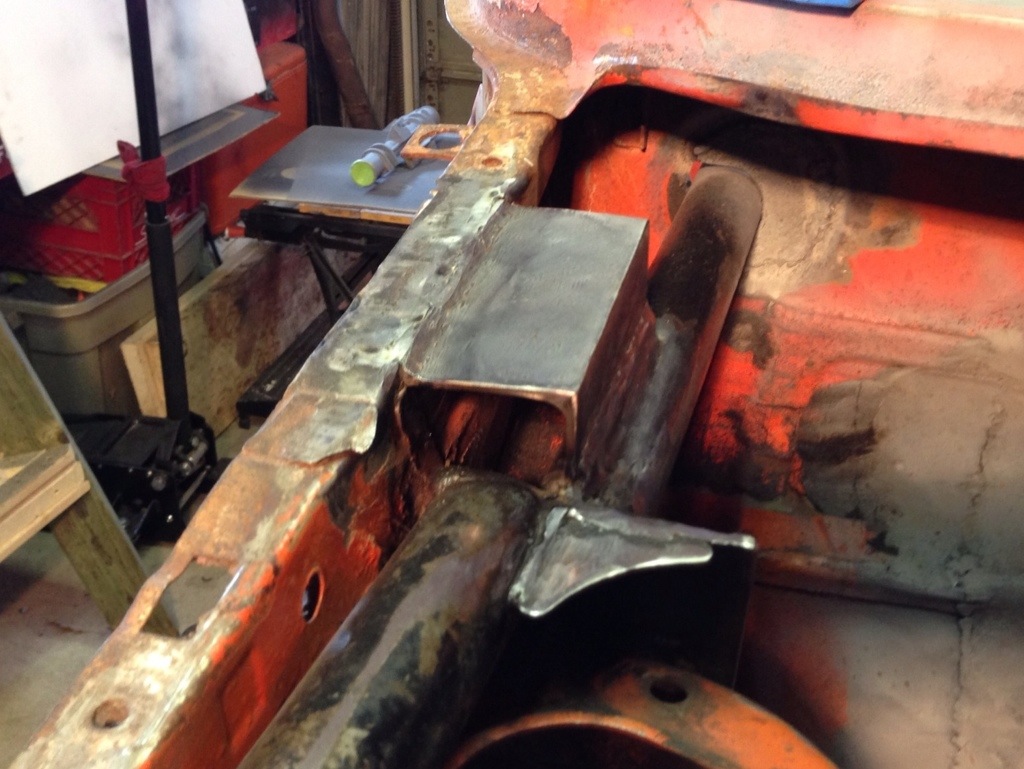
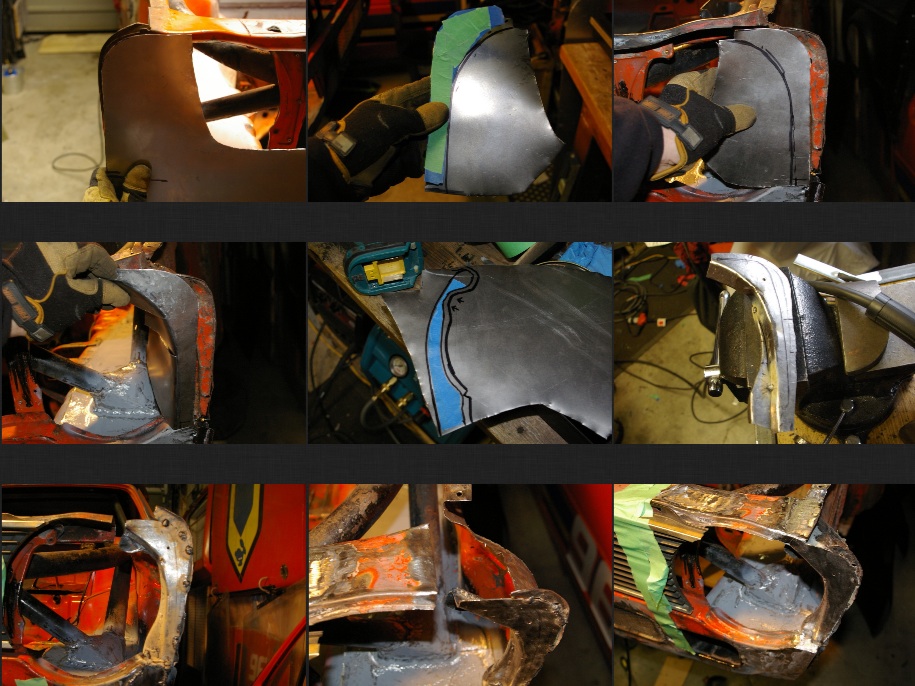
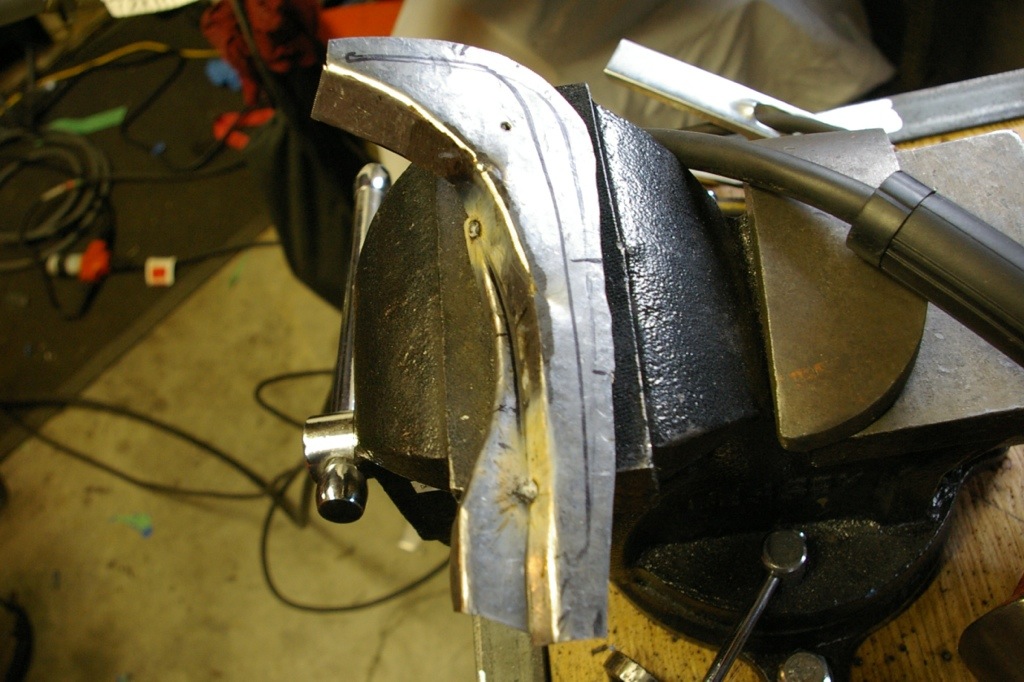
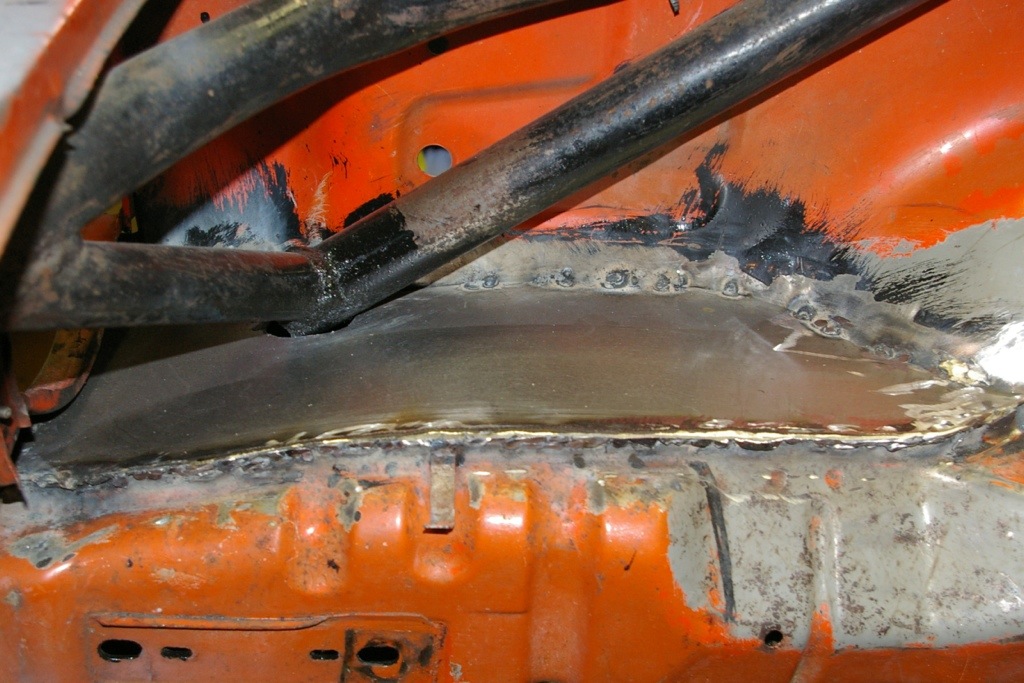
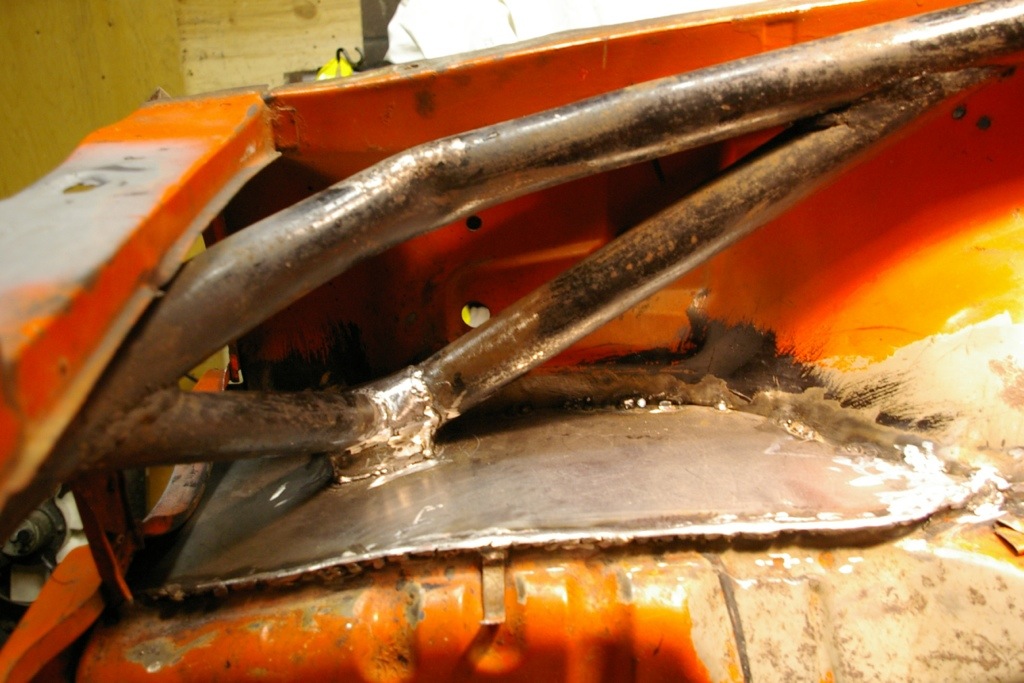
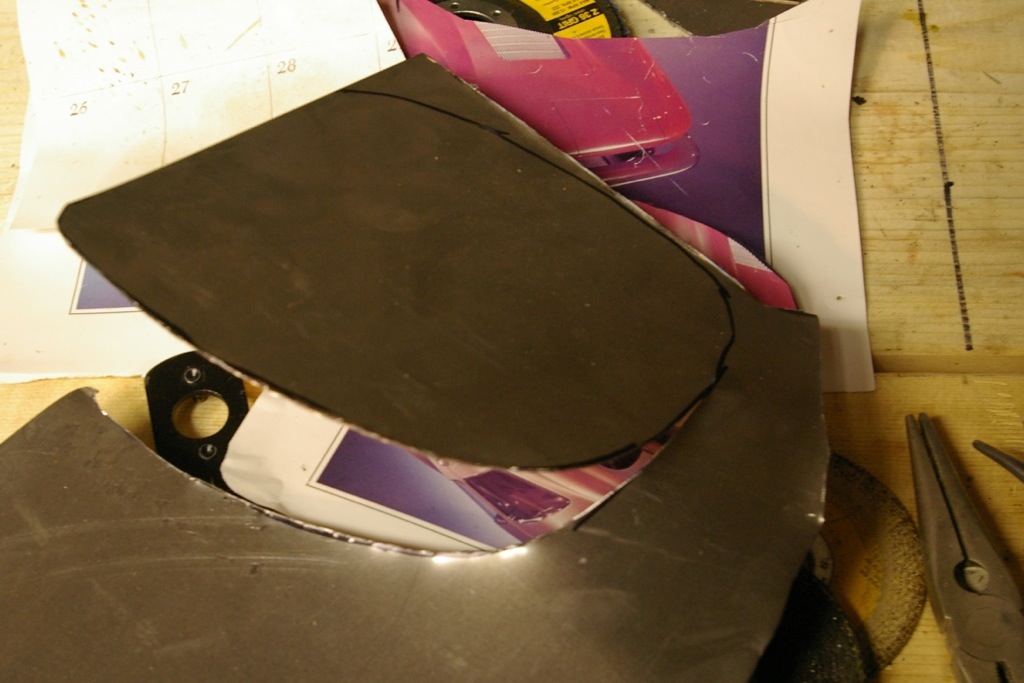
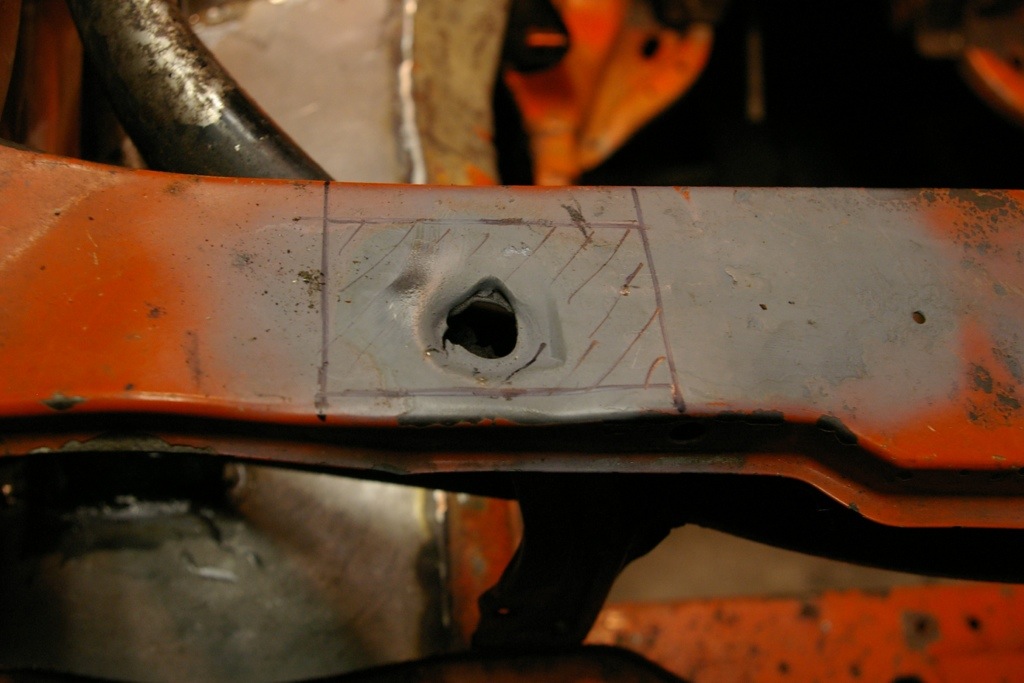
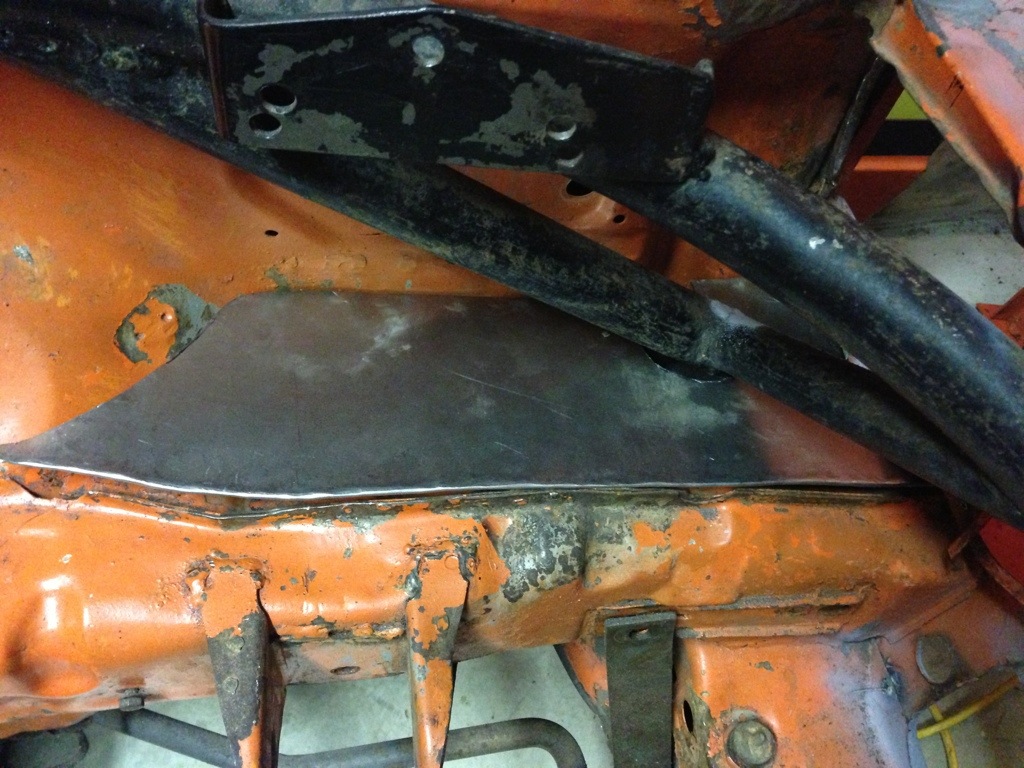
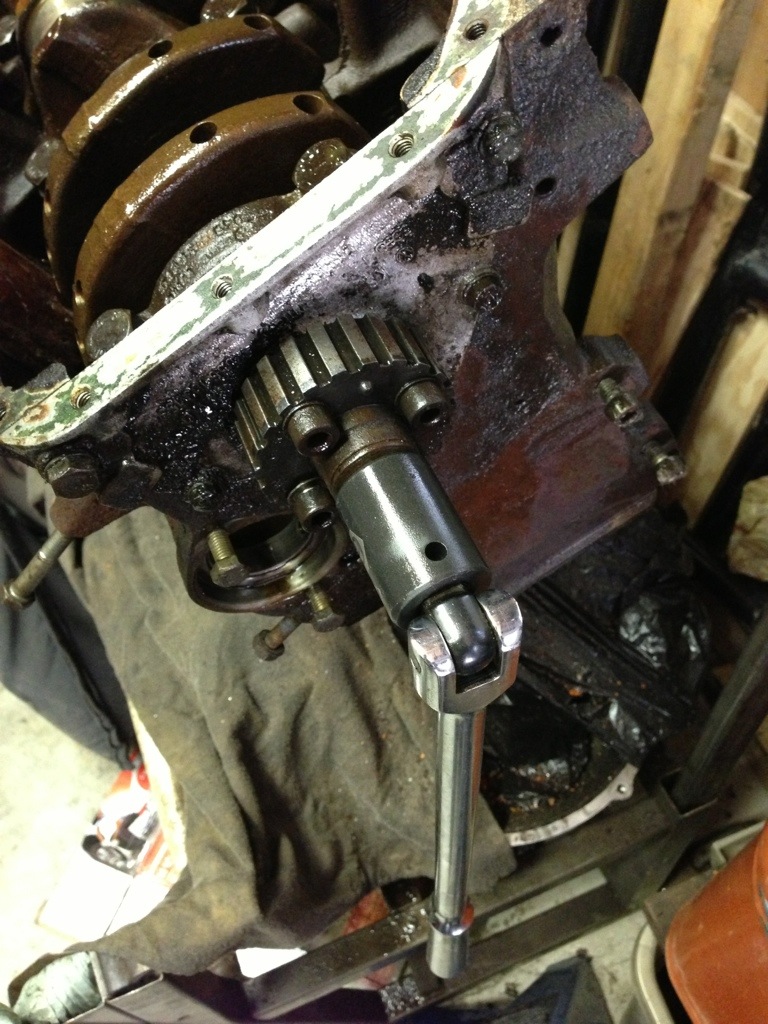
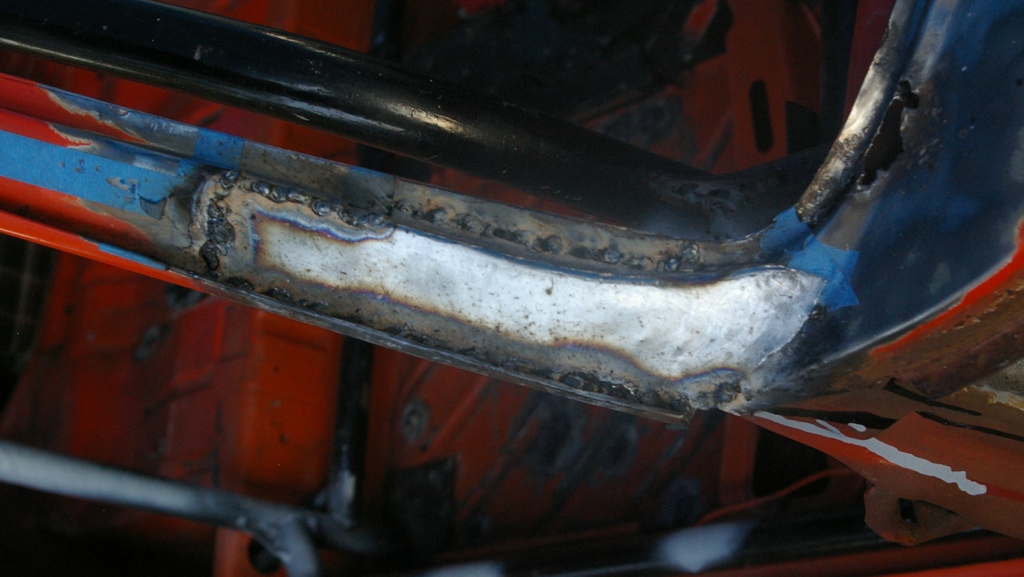
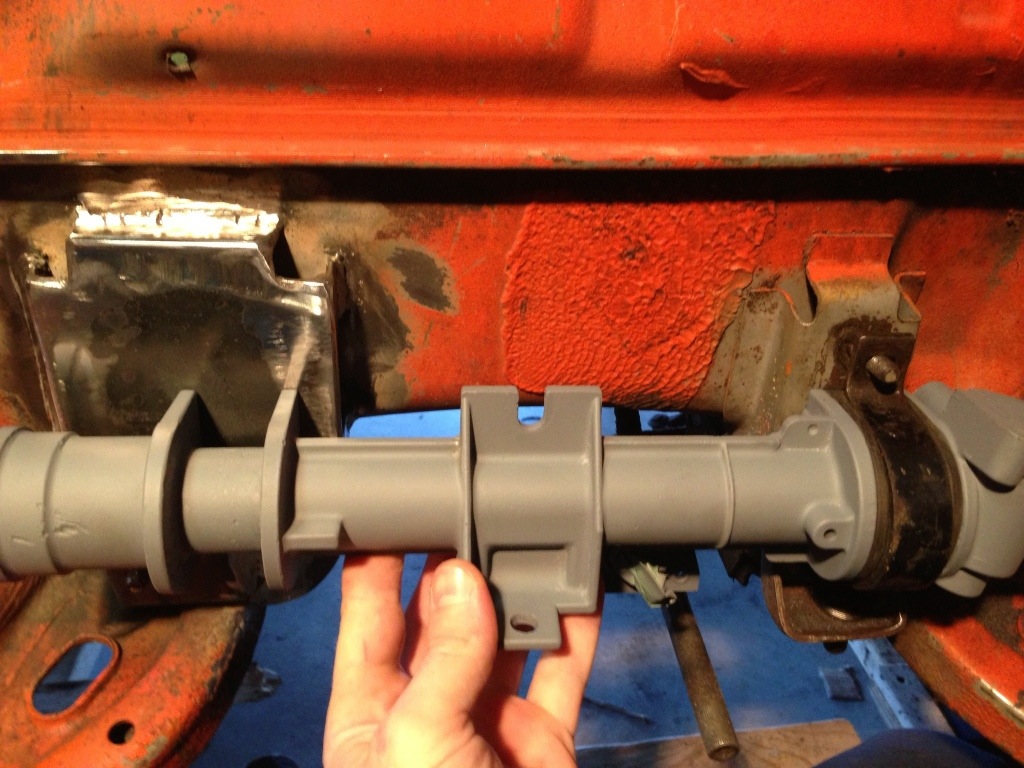
I’ve been somewhat absent from this build over the past weeks as i have had to keep my priorities straight. Though the desire to work on it has been there without a doubt. Time eventually allowed me to get a good couple days in before I had to leave it for at least the next 4 weeks. I was able to finish up the supports for the hood pins as well as fab up a piece to retrofit a newer style steering rack into the car. The older style racks use only three bolts and the newer ones use four and a slightly different spacing. It’s a pretty common mod if you already have the car torn apart and makes finding replacement parts much easier. Also on the done list are the c-notches in the frame.

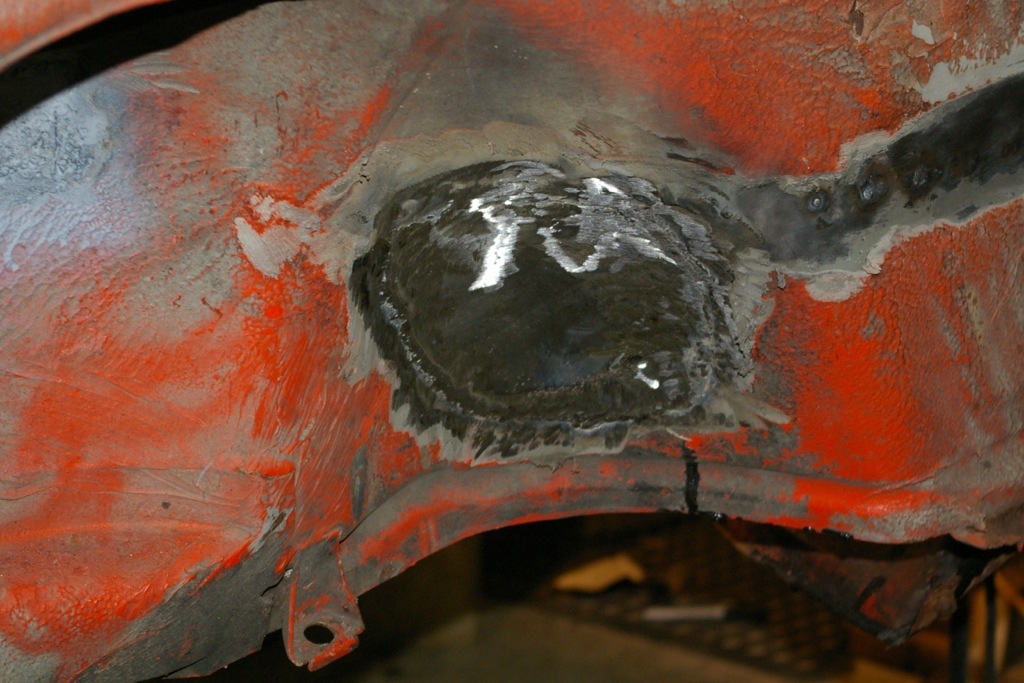
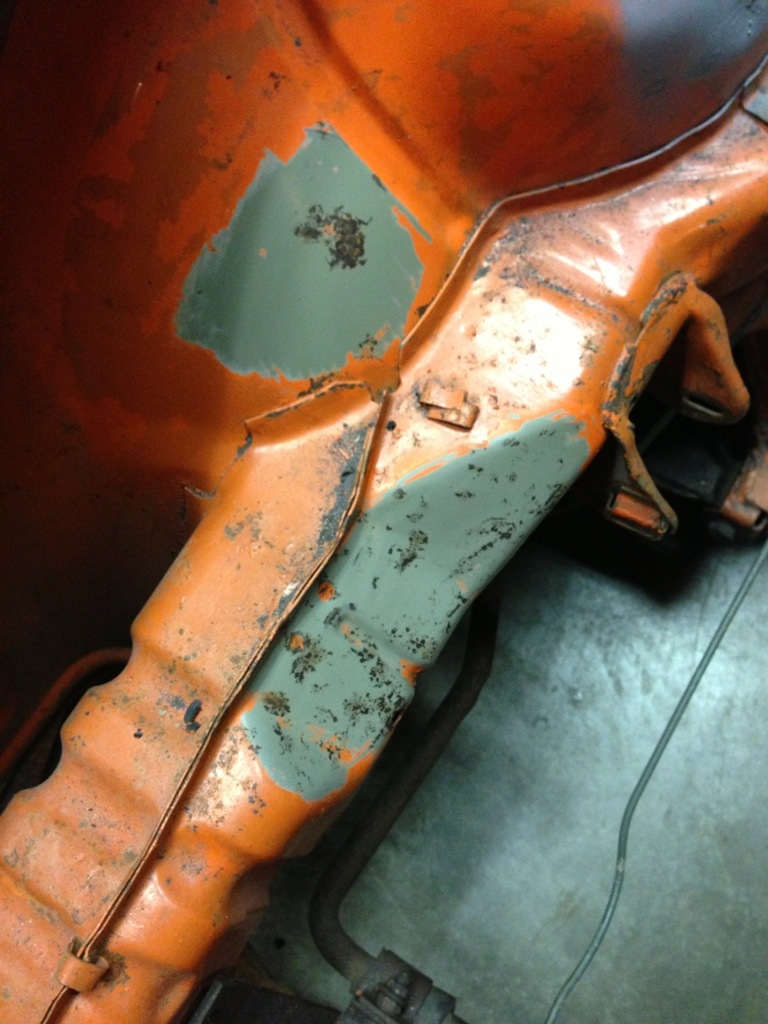
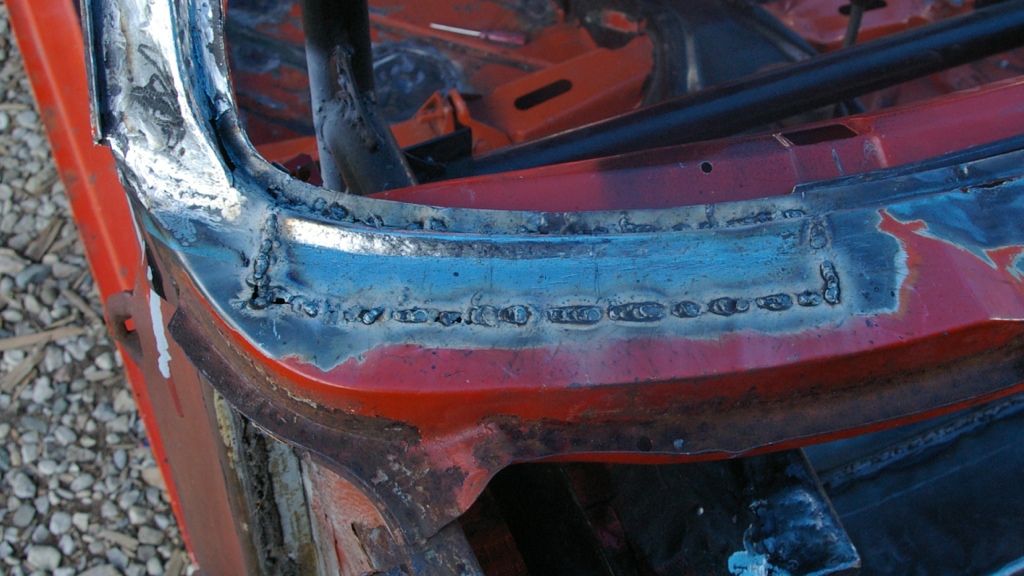
I’m sure there’s a lot of mixed feeling on the c-notch but if you really wanna go low this is a must do mod. A little more grinding and clean up on all the pieces and they’ll be ready for filler and primer.

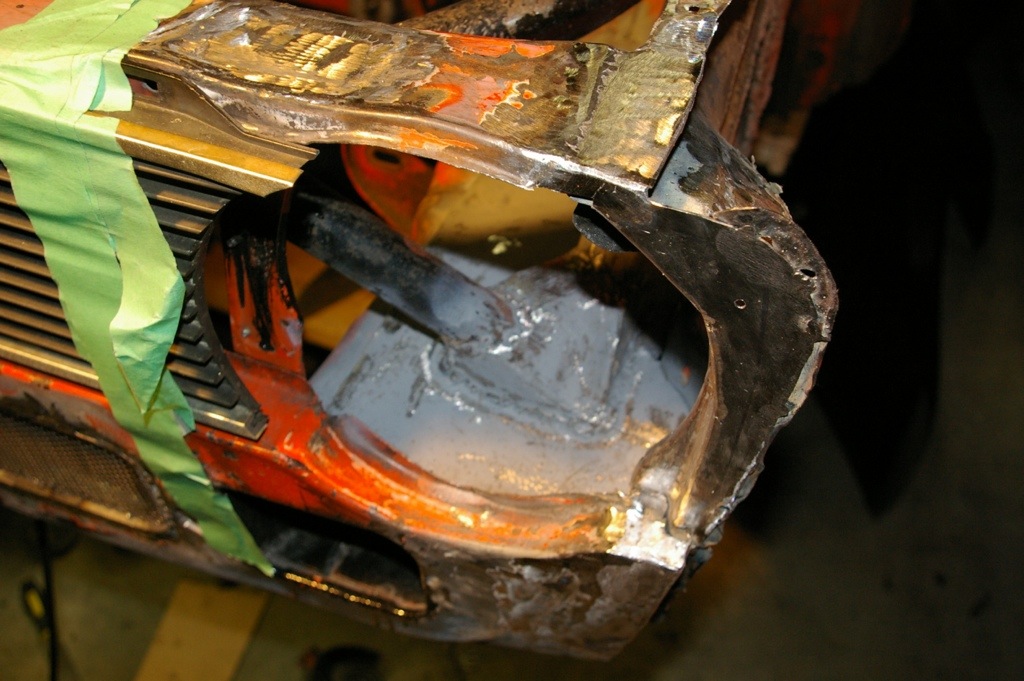
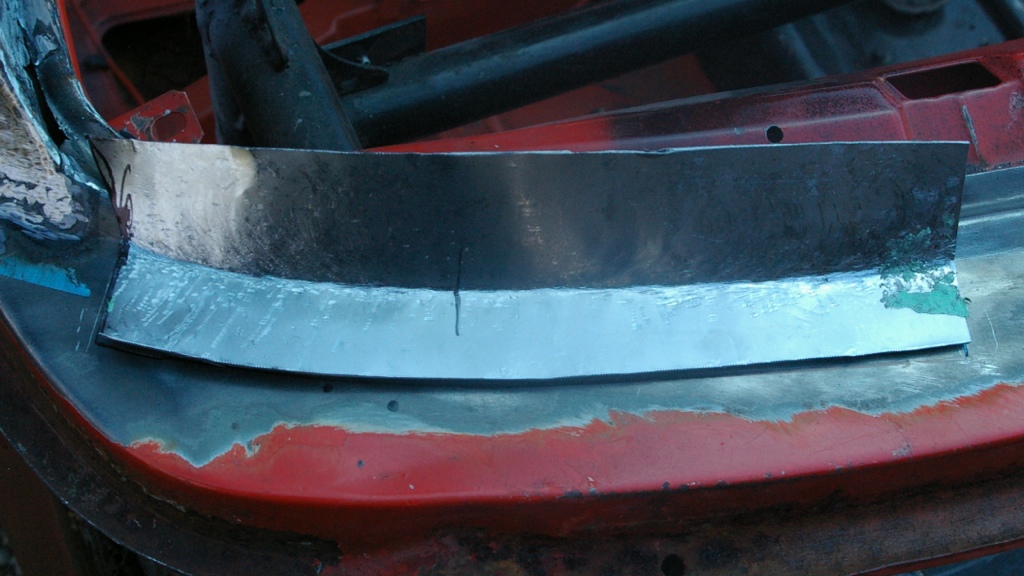
Metal work on the front is almost done and I’m excited to move on the the rear of the car as there is far less work to be done on the back half. Once that’s all buttoned up I can start to clean up and prep some areas that get the POR15 treatment then it’s on to body filler.


A great new tool to my arsenal is a auto tinting welding helmet. If your welding body work you’ll be glad you got one. It was amazing how much faster each job was done. Not needing to constantly lift the helmet up and pull it down between welds was so nice. Each weld was also cleaner and more precise, its the best new tool of the year so far.

VW MK1 Restoration – Something Old Into Something New.

20121215-013519.jpg

Transforming something old into something new is not all that hard. A little elbow grease can turn even the oldest looking thing into something fresh. Years of road grime and natures elements eliminated in minutes with metal polish and a felt disk on a Dremel tool. Something like this old oil cap, ‘oel’ cap to be exact, can be polished with minimal effort. I’ve learned a few things about polishing that may help, your gonna get dirty, like cover in crap flying off the Dremel covering you head to toe dirty. So wear eye protection, and work cloths, not your Sunday dress. Heat is your friend, as the metal heats up it seems to becomes easier to polish, I don’t know why but I’m sure there’s an explanation on the Internet somewhere. If you really spend some time you could turn any item into a mirror finish. Rather then remove all the imperfections I’ve actually come to like the used but restored and refinished look. It adds much character and a nice loved look.
Enjoy!

MK1 VW – Fixing It All And Doing It Right.

head Light  Surround

The more I work on the car the more i find my self wanting to fix areas that previously i may have given a pass since it may not have been seen, like in this case behind the grill.  The light surround was a little mangled yet the grill and lights still fit, i could have left it but i felt the need to do it right. With the amount of work I’ve put in to fixing the front it probably would have been smarter to just buy a new one. I guess that’s not really the point though and there is a certain quality to the original body that is not matched by the aftermarket variety.

VW MK1 – Parts bazaar.

All this plus a wiper assembly, fender and a pair of small tails for so little money.

I’m always on the look out for parts that I need for this restoration rebuild, searching websites like kijiji and the Vortex ill pick up various bits here and there from an assortment of cars nuts and characters. You have to look hard for something’s and other just fall right in your lap, for the most part things tend to be reasonably priced. Like whole motors and sets of seats for a hundred bucks, by far though the best deal I’ve come across was a one time garage blow out. There were so many items for vintage VW’s it would have been a candy shop for any enthusiast. Loads of air cooled and early water cooled stuff. I spent many hours searching though dusty bins and shelves, and boy was it worth it. I picked up a great replacement fender for 40 dollars and it’s not a cheep repo either. I then proceeded to fill up some boxes, a Bentley manual that for the most part works with this car, a full set of chrome center hub caps, a set of door handle gaskets, 20 light bulbs, some thread repair tool kits, a wiper assembly, metal oil cap, left side chrome trip grill, water pump gasket, two rear wheel bearings kits, two front control arm ball joints, a really nice metal Volkswagen trim piece, and a set of tail light that are almost mint from a 74/75 rabbit. The real kicker here is that all this other stuff cost me a whopping 40 bucks, I almost feel as if I stole the stuff it was so cheep. Without a doubt the best deal of the year.

MK1 VW Car Restoration – A lot of metal work.

More and more little jobs keep popping up and presenting themselves as challenges and learning opportunities. As you start to dig in to the restoration and customization of a car you’ll find yourself coming up with new ideas and what ifs. What if I do this? what if I do that? Eventually you have to nail it down and commit to something and then move on to the next little challenge. A lot of this my friend is fly by the seat of your pants. And that make it really exciting.

I started with some patchwork on the inner fender after using some por15 on the insides of the unibody frame rails. I then moved on to some filler panels as well as some cosmetic welding to tie the roll-cage into the filler panels. Still a fair bit of clean up grinding needed on the welds to smooth them out but I needed to make a trip to pick up some grinding bits so I decided to move on. There are two vents just behind the front bumper. Normally these vent are plastic inserts, Instead of using the plastic ones I started to fab up a trim ring that a metal mesh vent will fit into. The last bit of welding I was able to get to was to reinforce and area on the front that the hood pins get secured to. Previously this area was just the factory sheet metal with the pin bolted to it, not the best and most safe as the sheet metal is quite thin in this area. To reinforce this area I used a piece of thick L channel that was welded direct to the roll-cage and sheet metal. It is much more stable and secure now.

VW MK1 Restoration – Car Dolly and More.

When your doing a restoration like this you will eventually come to a point where you will want to take all the suspension and wheels off the car. Not a big problem if you have space to leave the car on jacks and still work on all side. Unfortunately I have limited space and need to move the car around to work on it. My solution was to build a simple wooden dolly that supports 4 large jack stands. I started by dropping a plumb line down from each of the jack points making a mark on the floor. This allowed me to take accurate measurements and get the placement or the jacks just right. Once all the measurement were taken, I built some bases to hold the jacks. I then laid them out centered on the floor marks and built a frame to support them.

The castor wheels are really heavy duty and if you plan on doing something like this I recommend you take the time to find a suitable set that will support the weight of the car as well as still roll easily while under load. To get the car up on the dolly was not the easiest or smartest thing to do alone. Yet if you take your time and plan and think ahead, doing it by yourself is totally possible. Slow and steady is the key.

The one tool that made getting the car up on the dolly possible was a farm jack, which is a very dangerous tool is you don’t respect it. You would never think it, but I’d say even more dangerous then a angle grinder. Capable of lifting the car very high and from only one point there is a great chance of the car coming crashing down. You can minimize the risk of this by placing blocks under the car as you jack it up. This way if a jack fails the blocks will catch the car.

The car is now ready for the rest of the bits an pieces to be removed which will allow me to continue the body work and restoration. The added height really makes a difference when working on the car. No longer am I hunched over or kneeling on a pad. I can now stand and work more comfortably. Which will speed up all the work that still need to be done.

After washing the engine block and getting all the gunk off I masked and sealed all the openings so it can be primed and painted. Once dry I installed all the internals coating all the bearing surfaces with engine assembly lube. I also installed new gaskets and seals all around. The assembly lube is great if you plan on building your engine but maybe not starting it right away. The lube is very sticky and will protect the internals of your engine from corrosion while its sits patiently waiting for a spark and oil in its pan. It will also help protect your engine the first time it starts and give the oil pump a chance to circulated some oil.

DIY Car Restoration:Welding and Engine Update.

I’ve nearly completed the major metal work on the front of the car, so I tested the paint remover I obtained. It had a terrible smell but worked effectively; just brush it on and wait 10 minutes. The paint eventually becomes soft enough to wipe off with a cloth. It seems to remove all the paint except for the factory corrosion coating. If you media blast the car to remove the paint, you should really paint it within a few days. Bare metal will rust quickly, overnight even int the right conditions. While stripping paint with chemicals can be a smelly job, it allows the car to sit unpainted for a longer time.

There is still some metal work needed on the front, but it’s mostly for looks. I started making fill panels to smooth out the engine bay. I still need to create some patches for the inner fender well. I’ve noticed a big improvement in my welding and metalworking skills. It really is true that the more you practice the better you get .

I also began restoring the engine block. First, I removed the pistons and other parts, keeping them in order for reassembly. The bolt on the end of the crankshaft was really hard to loosen. I broke a socket and a long handle trying to get it off, so I had to buy a replacement. It was frustrating, but taking a break helped me rethink my approach. After using heat and penetrating oil, and a lot of effort, I finally got it off. The rest was pretty easy. After cleaning the inside and washing it, I masked it off to paint the block.

DIY Car Restoration: Now in 3D

Along side building the actual car I’ve been building a 3d model. Its allows me to try different colors and detail ideas before actually committing to them. For instance, At first I had a lot more chrome trim around the windows. I thought it was what I wanted but after seeing it in some renders I decided against it. It was too flashy, and took over the car. I wanted the chrome bits to accent the car instead of command it. As for color, well that’s a tough one. So far I’ve been leaning towards the original colour of the car which is called Rallye Red. Why they call it red I don’t know because it’s a lot closer to orange then it is red.

DIY Car Modification: Engine is coming together.

20120906-202216.jpg

Got some gaskets in the mail today so I did a little test fit with the cleaned up exhaust headers. It’s looking good so far but the real test will come when the thing is started for the first time. I’m not very hopeful on a first start. I’ve psyched myself up for at least a week of frustration and failure when it comes to that time.

DIY Car Modification: Some pieces you can’t buy.

A lot of pieces for the body are still availability as aftermarket replacement panels. Some things however either need to be cut out of a donor car or you need to fabricate them yourself.  I felt like giving it a shot at fabricating the pieces myself but didn’t really know we’re to start. I watched a bunch of videos and read some articles and in the end I found that you either need to buy a lot of fancy presses and tools to make the job easy, or that with some time, patience and a lot of hammering you can fold and manipulate the sheet metal with only two basic tools, a hammer and a dolly. These two tools can be used together to make just about any shape you want, as well as bring beat up and battered pieces back to life.  I don’t have a crazy workshop or a fancy workbench either, just basic stuff, and with this I managed to bang out a few custom bits in a few hours. Granted they are not perfect but they fit well and will take only a small about of filler to smooth out the imperfections.